Debian 13 on a ZWO ASIAIR Plus
Flash the first-gen ZWO ASIAIR Plus (a Raspberry Pi CM4 inside, built before ZWO moved to Rockchip) with the ready-made OpenAstro image. A guided script backs up the stock ZWO OS, writes the new image to the internal eMMC, and can put the stock software back later.
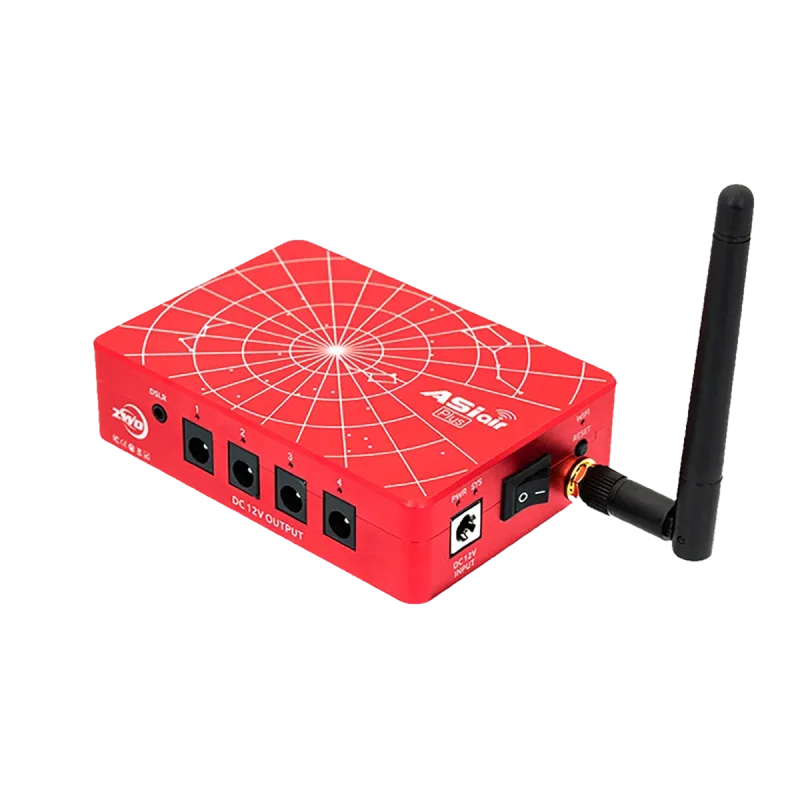
These instructions will not work on the Rockchip ASIAIR Plus. For that model, see ZWO ASIAIR Plus (RK3568).
Flash with the guided script
The ASIAIR Plus runs from the CM4's built-in 32 GB eMMC. You flash it over a USB cable using the script in the openastro-zwo-asiar-plus-cm4 repository. The script works on Linux, macOS, and Windows. It backs up the stock ZWO ASIAIR OS, downloads and flashes the latest OpenAstro image, and can restore your backup later.
The first time you run it, the script offers to install rpiboot, the Raspberry Pi tool that lets your computer see the eMMC as a USB drive.
-
Get the script. Clone or download the repository.
-
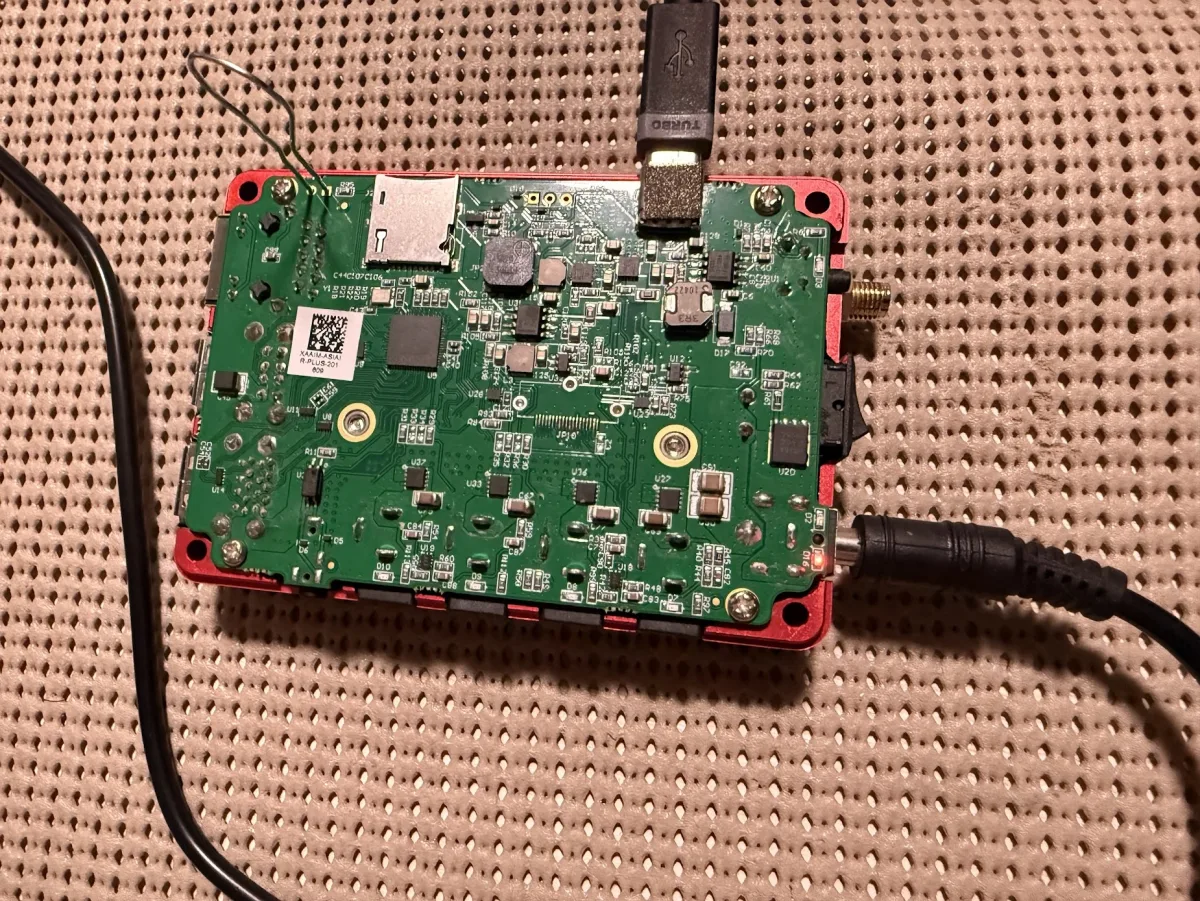
Put the ASIAIR Plus in flashing mode. With the ASIAIR Plus unplugged, open the case and short the two boot pads on the board with a paperclip or jumper wire, as shown below. Keep them shorted. Connect a USB-A (computer) to USB-C (ASIAIR Plus) data cable, then connect 12V DC power. The ASIAIR Plus will not turn on from the USB cable alone.
-
Run the script. On Linux and macOS:
cd flash./openastro-flash.shOn Windows, open PowerShell as Administrator and run
flash\openastro-flash.ps1. Both show the same menu:1) Backup - save the stock ZWO ASIAIR OS from the eMMC (do this first!)2) Flash - write the OpenAstro image to the eMMC3) Restore - write a stock backup back to the eMMC -
Back up, then flash. Choose Backup first. When it finishes, choose Flash.
-
Boot OpenAstro. Unplug the 12V power and the USB cable, remove the paperclip or jumper, close the case, and power the ASIAIR Plus from 12V as usual.
The stock ZWO ASIAIR OS is not available for download anywhere. The backup you make in step 4 is the only way to get it back, so keep the file somewhere safe.
The image already has the ASIAIR Plus's hardware set up. The 12V DC outputs turn on at power-on, the USB 3.0 ports work out of the box, and the built-in buzzer plays the OpenAstro jingle when the device is ready, so you know it's up without a screen.
The image's kernel has HIDRAW enabled, and a udev rule gives access to ZWO devices, so ZWO EAF focusers and EFW filter wheels should work out of the box.
Connect to the device
The image comes up with these defaults:
| Setting | Value |
|---|---|
| Hostname | openastro |
| Username / password | astro / astro |
| WiFi access point | OpenAstro-XXXX (2.4 GHz), password 12345678 |
| WiFi AP address | 172.24.1.1 |
| Ethernet | DHCP |
| 12V power ports | On at boot |
XXXX is the last 4 hex digits of the device's WiFi MAC address (for example
OpenAstro-915D). It is set on first boot, so every device at the same site
gets its own hotspot name. The hotspot starts at every boot, so if you ever
can't reach the device over your network, join its hotspot and connect to
172.24.1.1.
Connect over Ethernet or join the OpenAstro-XXXX WiFi network, then SSH in.
Use one of these SSH clients depending on your operating system:
- Linux: Terminal (built-in)
- macOS: Terminal (built-in)
- Windows: MobaXterm (or PuTTY, or Windows Terminal)
ssh astro@openastro
Change the default password right away, then update the operating system:
passwd
sudo apt update && sudo apt full-upgrade -y && sudo reboot
Join your own WiFi network (optional)
You can manage WiFi from the AlpacaBridge web page, no command line
needed. Open http://172.24.1.1:6800 while joined to the hotspot (or
http://openastro.local:6800 from your LAN). On the Server tab, the WiFi
card lets you scan for networks, join one, and change the hotspot's name,
password, and band.
The hotspot keeps running after you join your home WiFi. Both share one radio, so while connected, the hotspot switches to your home network's channel. You can also skip WiFi and use the Ethernet port.
AlpacaBridge Comes Preinstalled
AlpacaBridge 3.5.1 is already installed and running, so the device works at a dark site right after flashing. No internet needed and nothing to install.
Its web page is on port 6800: http://openastro.local:6800 from your
LAN, or http://172.24.1.1:6800 when joined to the hotspot.
Keep AlpacaBridge up to date
Updates come through apt from the OpenAstro repository. Check
apt.openastro.net to see the latest AlpacaBridge
version. Whenever the device has internet access, update with:
sudo apt update
sudo apt install alpacabridge
The sudo apt full-upgrade command from the previous section also updates
AlpacaBridge along with the rest of the system.
Continue to Configure AlpacaBridge to set up your devices. If you ever need to reinstall AlpacaBridge by hand, see Install AlpacaBridge.
Restore the stock ZWO software
Put the ASIAIR Plus back in flashing mode (step 2 above), run the script, and choose Restore. It writes your stock backup back to the eMMC.