Debian 13 on an Orange Pi 6 Plus
Flash the ready-made OpenAstro image to a microSD card and the Orange Pi 6 Plus boots straight into a networked gear-control server. Two Ethernet ports, a CIX Sky1 chip, and room for NVMe. Verified on real hardware, with astronomy gear testing still to come.
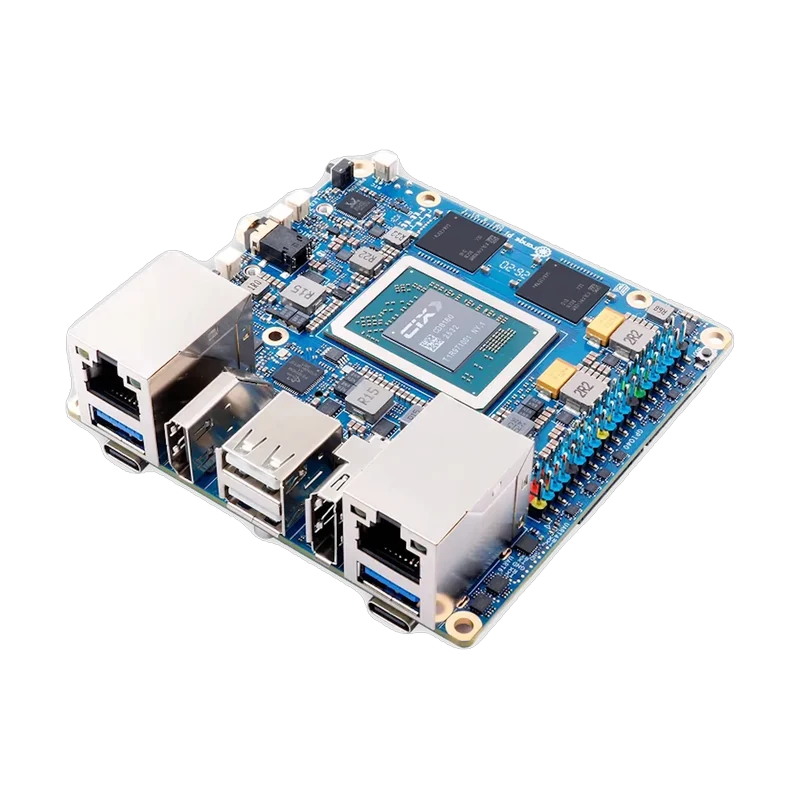
The v0.1.0 image is confirmed to boot on the board, with the astro login
working and AlpacaBridge running. Astronomy equipment has not been tested on
this board yet. If you try yours, please share your results in the
issue tracker.
Before you start
- Check the board first. Confirm the unmodified Armbian image boots on your board. The OpenAstro image does not flash or update board firmware, so it can't repair a firmware problem.
- Plan for WiFi. The image was tested with an Intel AX210 M.2 card. Other adapters are detected automatically, but they need a Linux driver, firmware, and access point support. With no suitable radio, Ethernet and AlpacaBridge still start.
Flash the image
-
Download the latest
openastro-orangepi6plus.img.xzand its.sha256file from the releases page. -
Check the download. On macOS, use
shasum -a 256 -cinstead:sha256sum -c openastro-orangepi6plus.img.xz.sha256 -
Write it to a separate microSD card (16 GB or larger) with balenaEtcher, Raspberry Pi Imager, or from a terminal:
xzcat openastro-orangepi6plus.img.xz | sudo dd of=/dev/sdX bs=4M status=progress conv=fsyncReplace
/dev/sdXwith your microSD device. -
Insert the card and power on. If another bootable drive takes precedence, select the card's UEFI boot entry.
Full details and build scripts live in the openastro-orangepi6plus repository, along with an experimental offline USB installer for moving to NVMe. The installer is not part of the release, so you'll need to build it yourself.
The stock kernel already has HIDRAW enabled and includes the HID descriptor fix for ZWO EAF focusers and EFW filter wheels, and the image sets up the USB permissions. Testing with real ZWO gear is still pending.
Connect to the board
The image comes up with these defaults:
| Setting | Value |
|---|---|
| Hostname | openastro |
| Username / password | astro / astro |
| WiFi access point | OpenAstro-XXXX (2.4 GHz), password 12345678 |
| WiFi AP address | 172.24.1.1 |
| Ethernet | DHCP on both ports |
XXXX is the last 4 hex digits of the WiFi adapter's MAC address, set
automatically on the first boot that finds a suitable radio.
Connect over Ethernet or join the OpenAstro-XXXX WiFi network, then SSH in. Use
one of the following SSH clients depending on your operating system:
- Linux: Terminal (built-in)
- macOS: Terminal (built-in)
- Windows: MobaXterm (or PuTTY, or Windows Terminal)
ssh astro@openastro
Change the default password right away, then update the operating system:
passwd
sudo apt update && sudo apt full-upgrade -y && sudo reboot
WiFi limits on the AX210
The AX210 behaves differently from the WiFi on the Orange Pi 4 Pro:
- The hotspot runs on 2.4 GHz only. Setting a regulatory country does not unlock 5 GHz for it.
- The hotspot and a client connection have to share one channel, so a hotspot on 2.4 GHz can't stay up alongside a 5 GHz home network on the same card.
To keep the hotspot available while the board is online, use Ethernet or add a second compatible WiFi adapter.
AlpacaBridge Comes Preinstalled
The image ships with AlpacaBridge already installed from the OpenAstro APT repository, so the board works at a dark site straight from the flash. No internet required and nothing to install.
The web portal listens on port 6800: http://openastro.local:6800 from
your LAN, or http://172.24.1.1:6800 when joined to the hotspot.
Keep AlpacaBridge up to date
Updates arrive through apt from the OpenAstro repository. Check
apt.openastro.net to see the latest AlpacaBridge
version. Whenever the board has internet access, pull the latest release with:
sudo apt update
sudo apt install alpacabridge
Continue to Configure AlpacaBridge to set up your devices. If you ever need to reinstall the service manually, the steps are in Install AlpacaBridge.